
CONTROL Resonant The Artist Boss Guide: Patterns and Abilities
The Artist is the first Resonant boss you fight in CONTROL Resonant, and it appears naturally during your first mission with agent Zoe Divera, when.

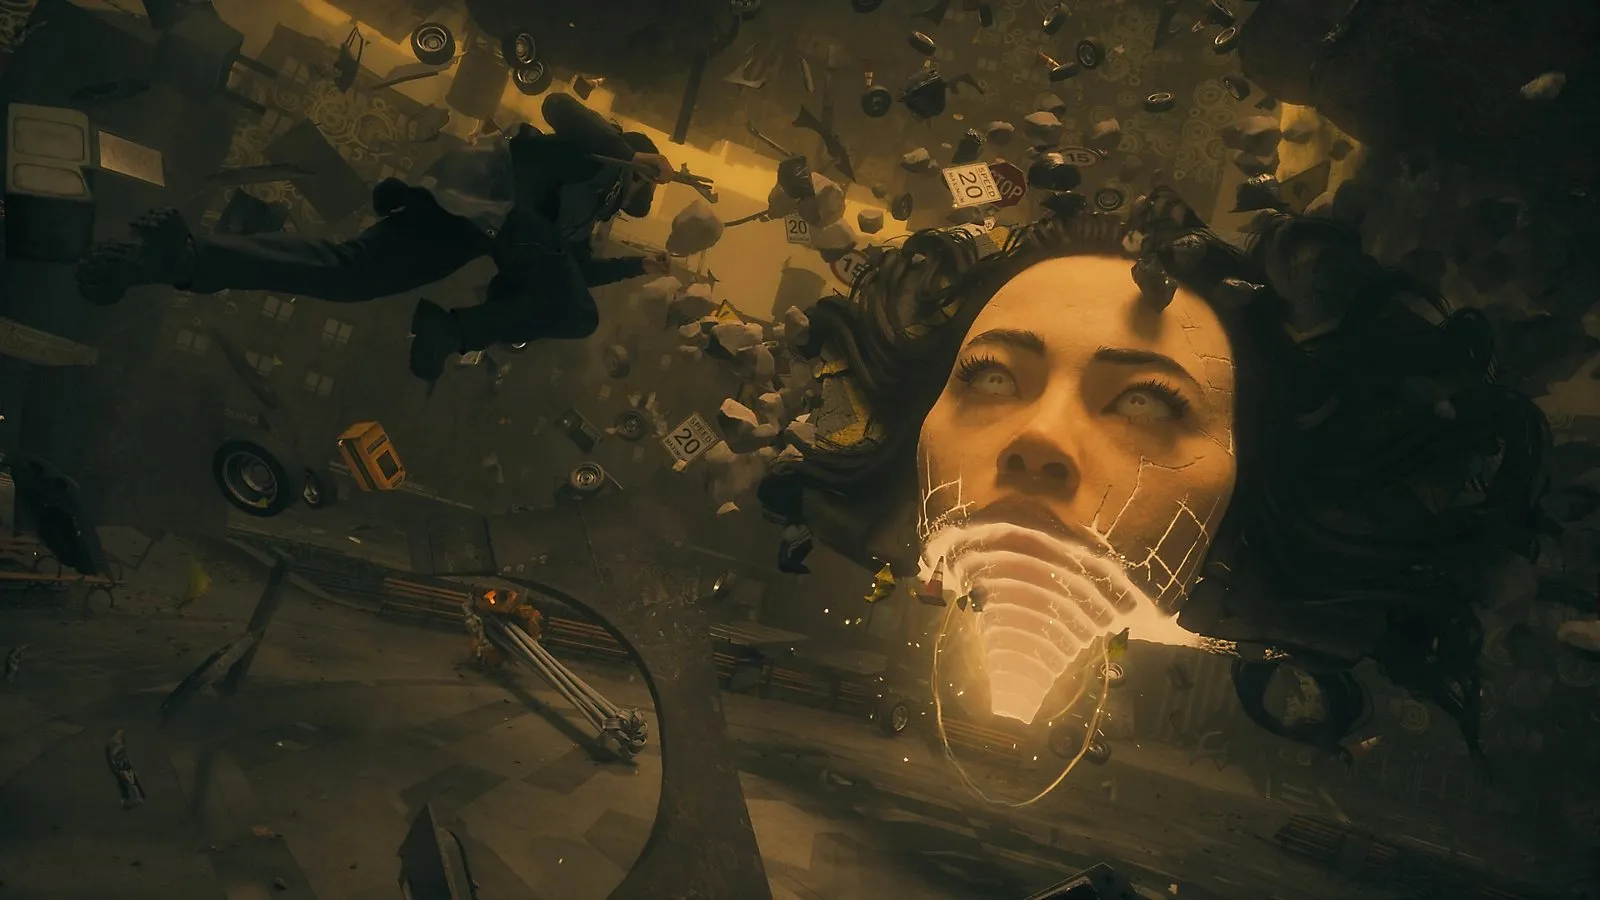
The Artist is the first Resonant boss you fight in CONTROL Resonant, and it appears naturally during your first mission with agent Zoe Divera, when you enter a fragment of Jesse’s memory. It is a face assembled from chunks of city debris, and it hits hard enough that the fight teaches the game’s real rhythm: stay close, keep moving, never let it dictate the distance.
Where the fight happens
You do not hunt this boss down. It blocks the path during the story section where you are following a fragment of Jesse, so you will meet it whether you are ready or not. Everything you learned about dodging in the tutorial is the toolkit you bring.
Attack patterns and the safe answer
| What it does | How to answer |
|---|---|
| Charges up and throws scattered rocks | Close the gap during the wind-up; jump or hover over the rocks and strike its head |
| Manifests two giant stone pillars and sweeps or slams them | Dodge through the swing rather than backing away — staying close keeps your damage window open |
| Throws ninja-star-like fragments, vehicles or loose stone when you are far away | This is the punishment for retreating; get back into melee range |
| Floats up and raises slabs of terrain around itself | Interrupt it — do not try to dodge the volley |
The pattern is consistent: the further away you stand, the more projectiles you have to deal with, and thrown vehicles do serious damage. Melee range is both the safest place and the fastest way to fill its Falter meter.
Interrupt the airborne phase instead of dodging it
When The Artist rises, it lifts several pieces of terrain and then hurls them at you two at a time. You can dodge that, or you can cancel it outright:
- Watch for the slabs to start rising.
- Jump onto the top of one of them immediately.
- Let it carry you to maximum height.
- Launch upward off the slab and dash at The Artist.
- Land one hit. That is all it takes — it drops every slab and cancels the charge.
Once you have that down, the second half of the fight becomes a repeat of the first half rather than a new problem.
Finishing it with a Falter execution
Keep pressing in melee range until the Falter meter fills. When it does, a prompt appears, letting you grapple toward The Artist and deliver the killing blow. If you have been chaining finishers elsewhere in the run, the timing will feel familiar.
Barrage versus Shield versus Volatile Anomaly
Winning lets you bind one of three abilities to L2/LT. This is a permanent build decision, so choose with your playstyle in mind.
| Ability | Damage and cost | Best for |
|---|---|---|
| Barrage | 60–180 damage, 12–36 falter, 400 power | Adding ranged pressure to a melee build |
| Shield | 100 damage, 60 falter, 150 to activate, 180 for Shield Bash | Survival and multi-target fights; dodge with Shield active to Shield Bash |
| Volatile Anomaly | 15 projectile damage, 150–350 explosion damage, 300 power, 120 to throw | Giving a pure melee build a mid-range option that also applies Falter |
If you have built entirely around close combat so far, Volatile Anomaly is the pick. It summons an ally you can throw and detonate. It chips enemies down while you keep comboing, and it applies Falter while doing it. If you are using the Glaive or Cleave forms, Shield is usually the better long-term pick. Those forms already clear groups well, so survival matters more. Shield converts a perfect dodge into a Shield Bash and keeps you alive in swarms. Barrage is a solid middle option, but it offers less utility than Shield over a full run.
If you are still struggling
Two things help immediately. Come back with movement abilities unlocked, which makes the aerial interrupt far easier. Assist Mode is also available from the pause menu, and it lets you tune incoming and outgoing damage. Nothing about the fight requires you to brute-force it.
Related pages
- Gameplay explains Falter, Dominance and the Aberrant’s forms.
- Trophy guide covers the boss-related completion goals.